Probably the most important element of macro photography is lighting. If you want to take good close up shots of spiders and insects you are going to have to use a flash. The problem is that a flash causes terrible looking, harsh highlights and shadows. The easiest way to fix this problem is a flash diffusor.
Here is a step for step guide on how to build your own portable and affordable flash diffusor for macro photography. You can also find a detailed YouTube video at the bottom of the page.
What you will need:
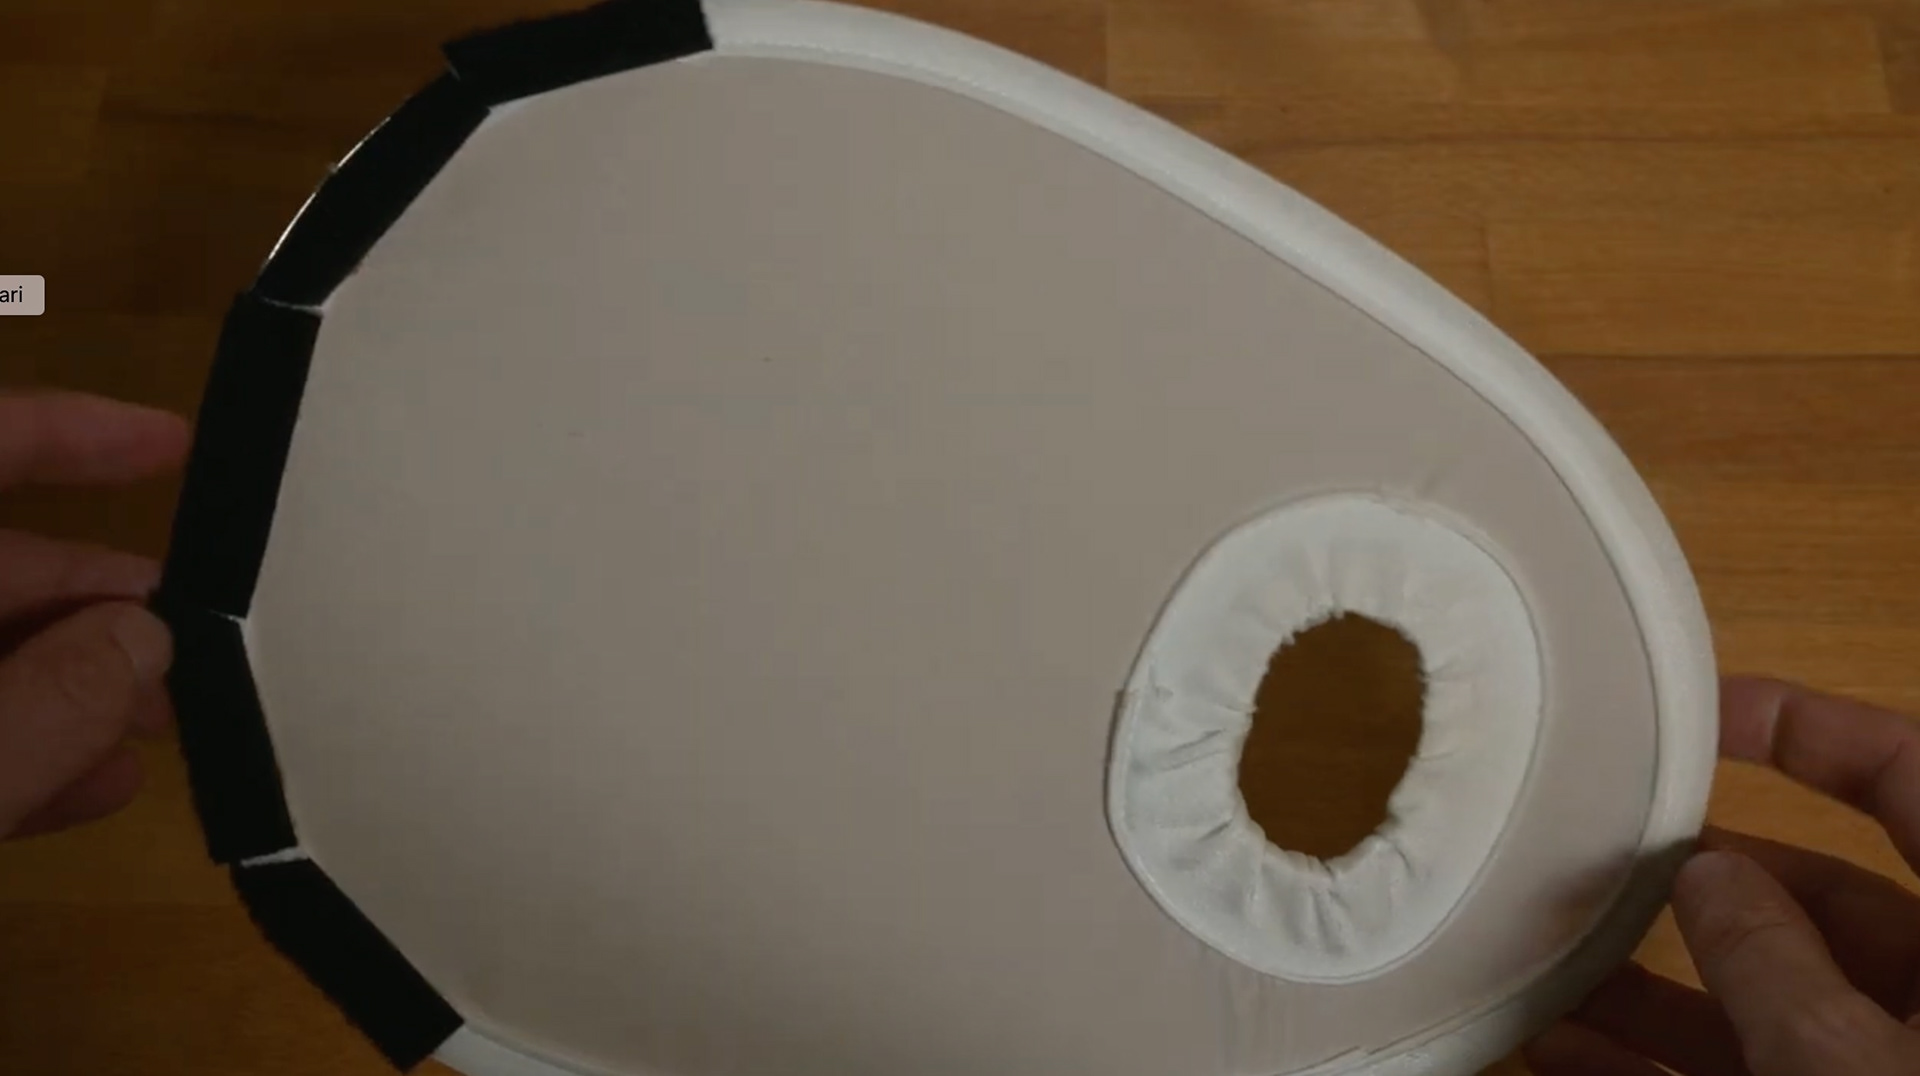
1 . A cheap foldable flash diffusor like this one*
2. Some Cardboard
3. Aluminium foil
4. Adhesive velcro strips
5. Some tracing paper
Step 1:
Attach some velcro strips to the foldable flash diffusor. Along the top on one side and along the bottom on the other side. I would recommend using the rough side of the velcro for the bottom and the soft side for the top.
Step 2:
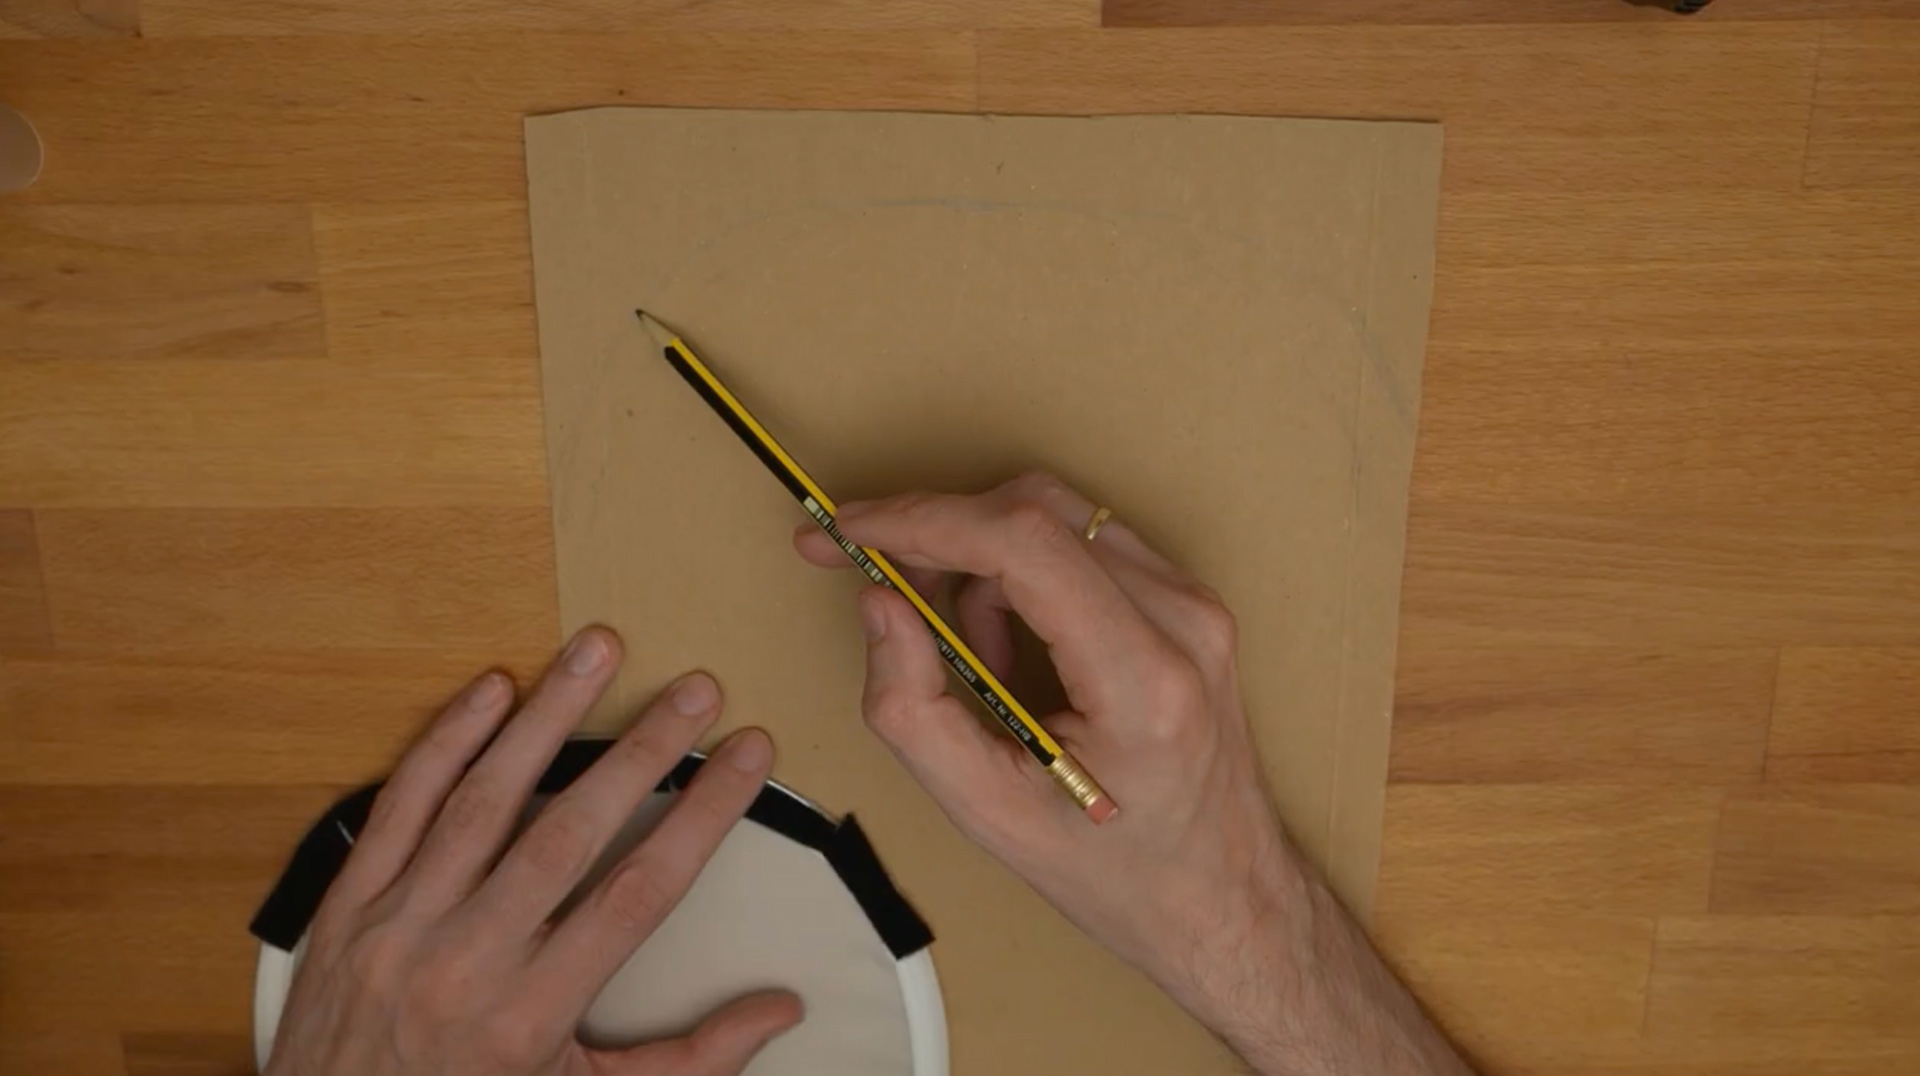
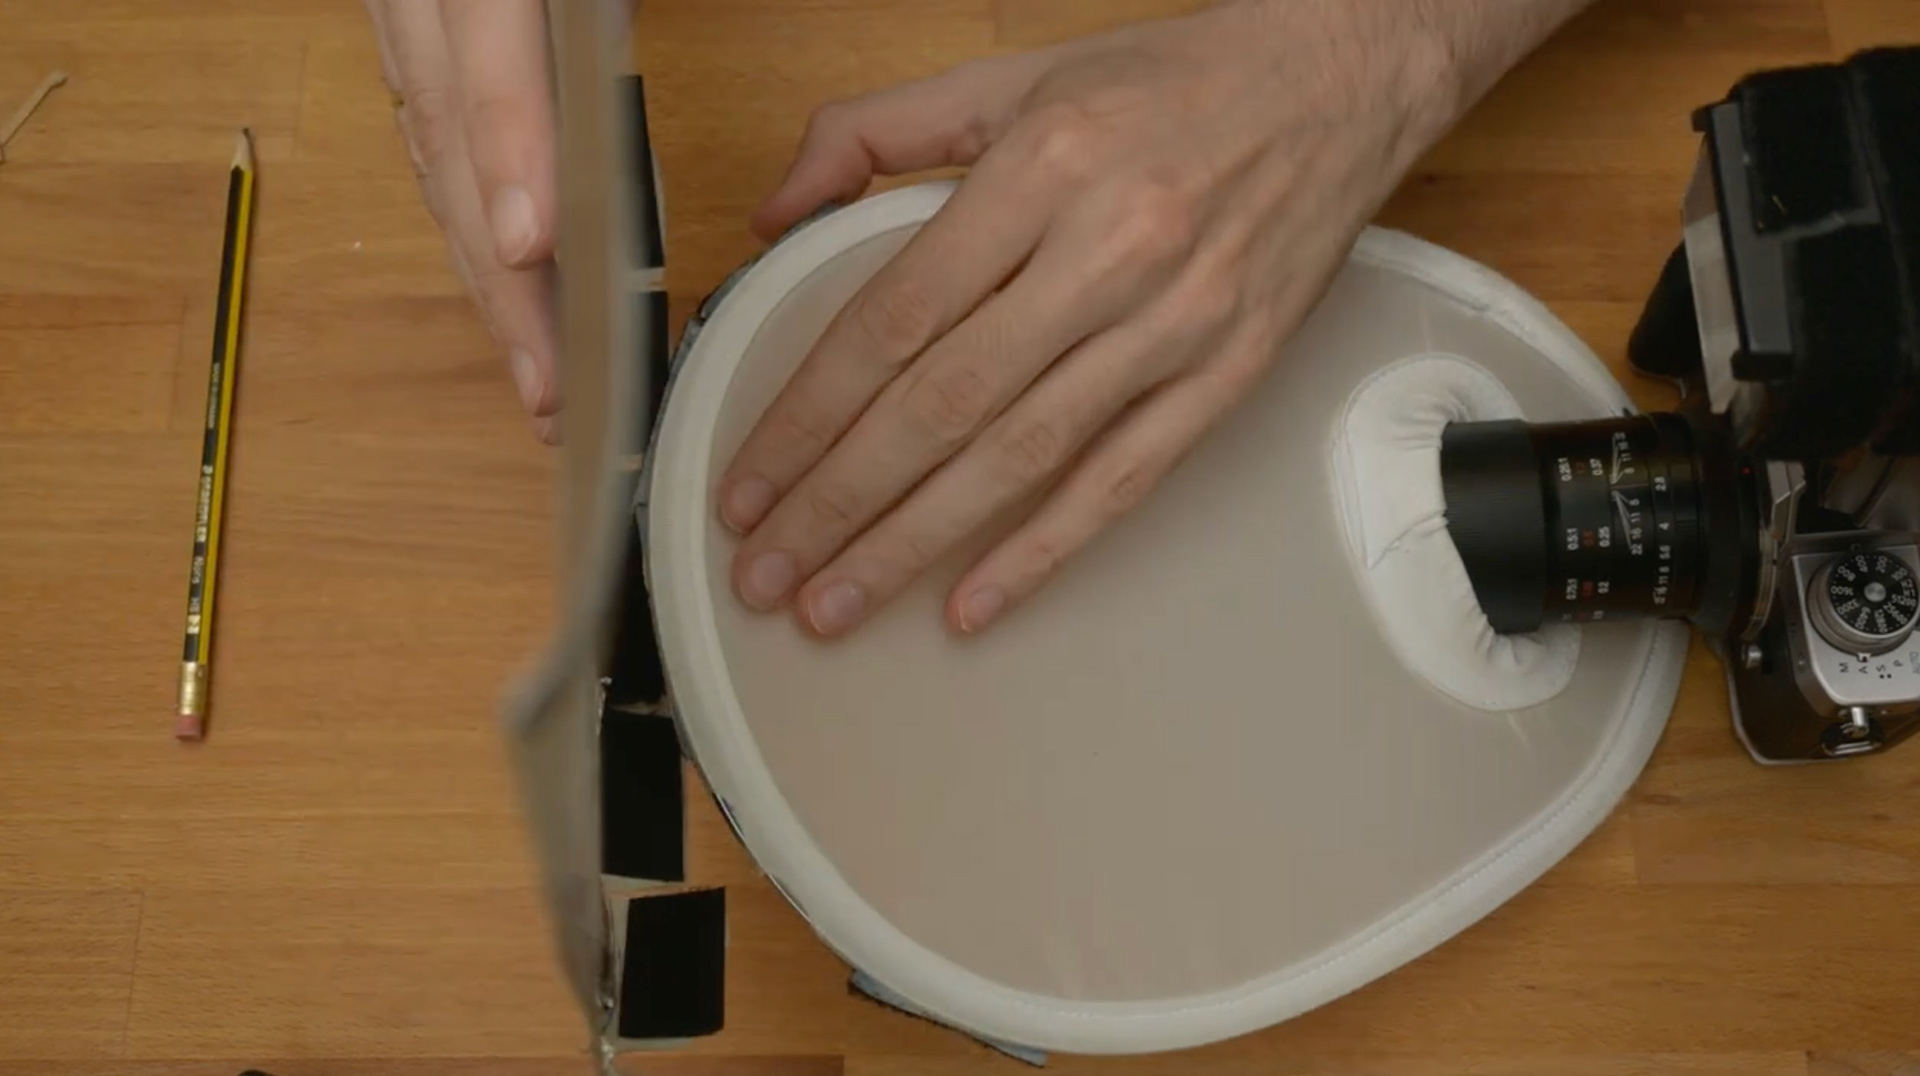
Cut out a piece of cardboard matching the curve of the top end of the foldable diffusor. This cardboard will become the roof. Don nott just trace the curve of the diffusor however. You will need to flatten the curve a little bit.
Step 3:
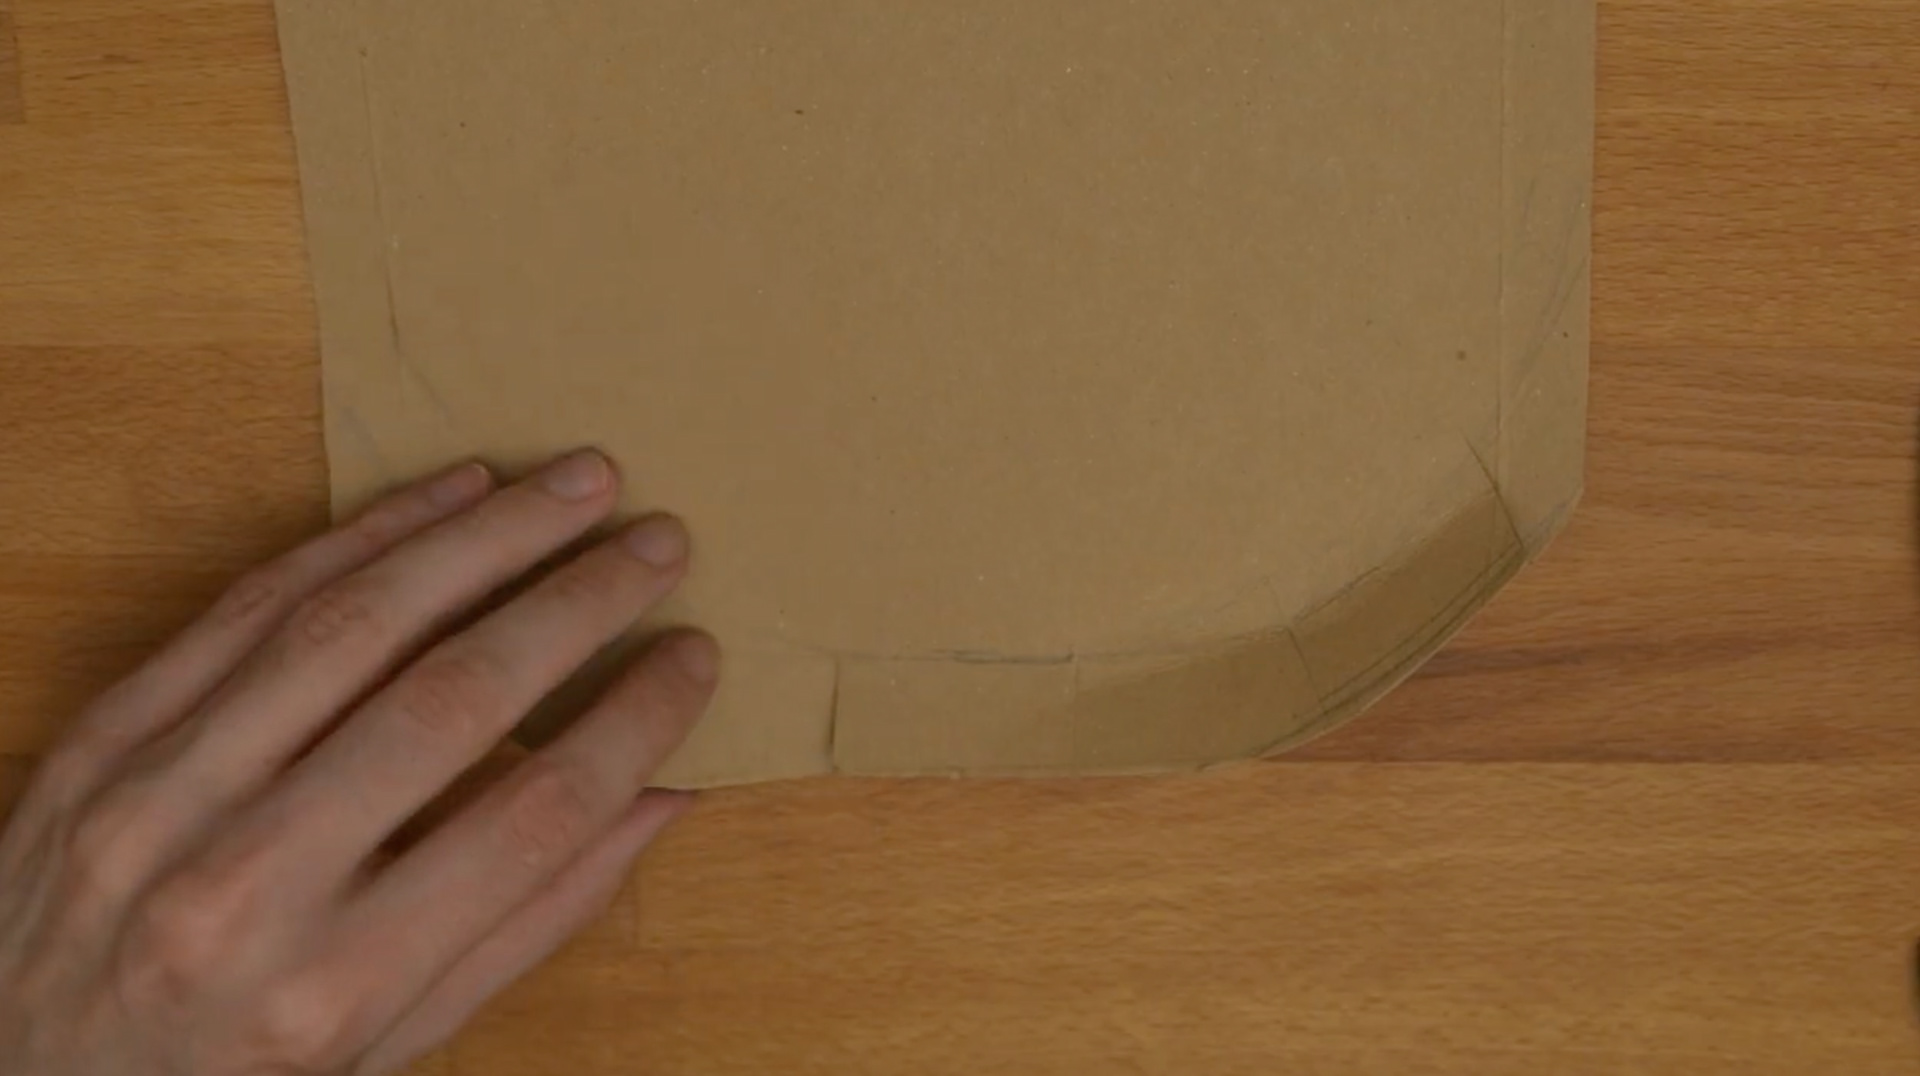
Cut a series of flaps at the top end of the cardboard. This is where you will be adding strips of velcro. Here i would recommend using the rough side.
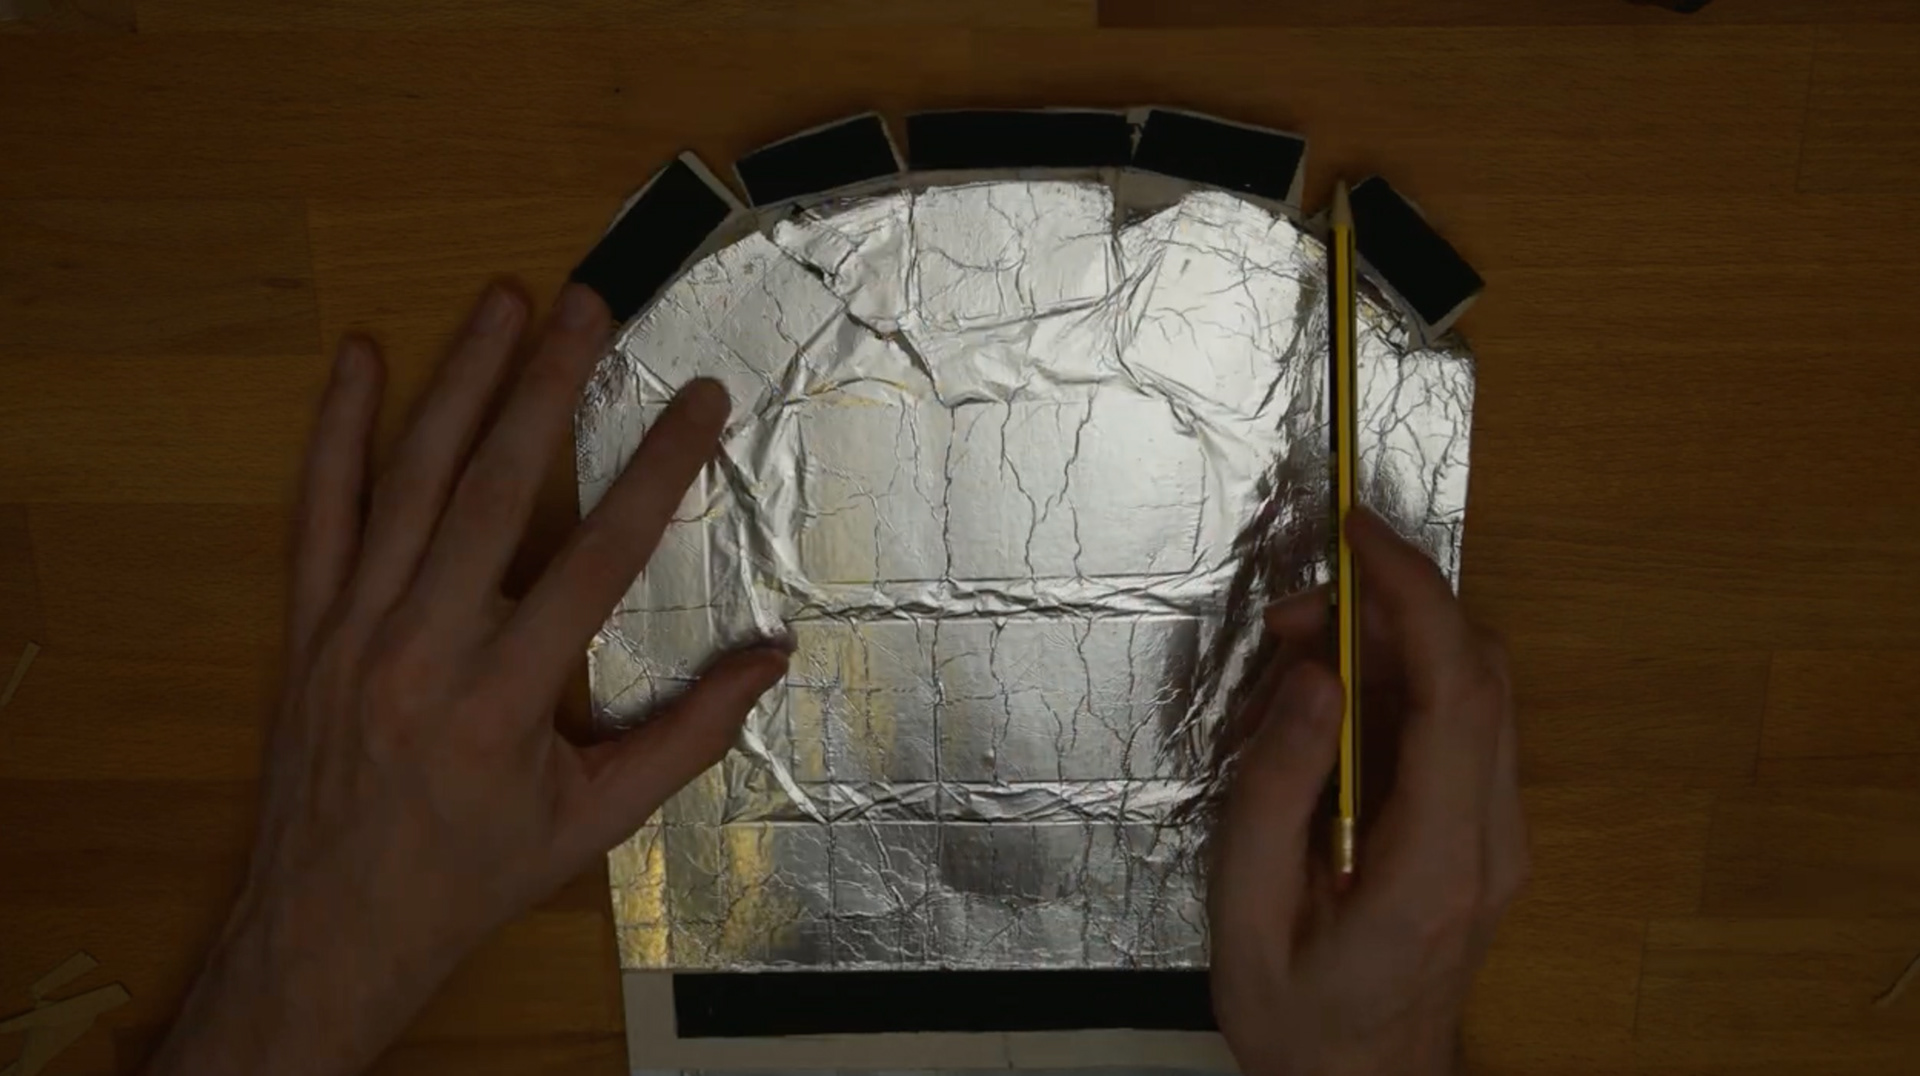
Step 4:
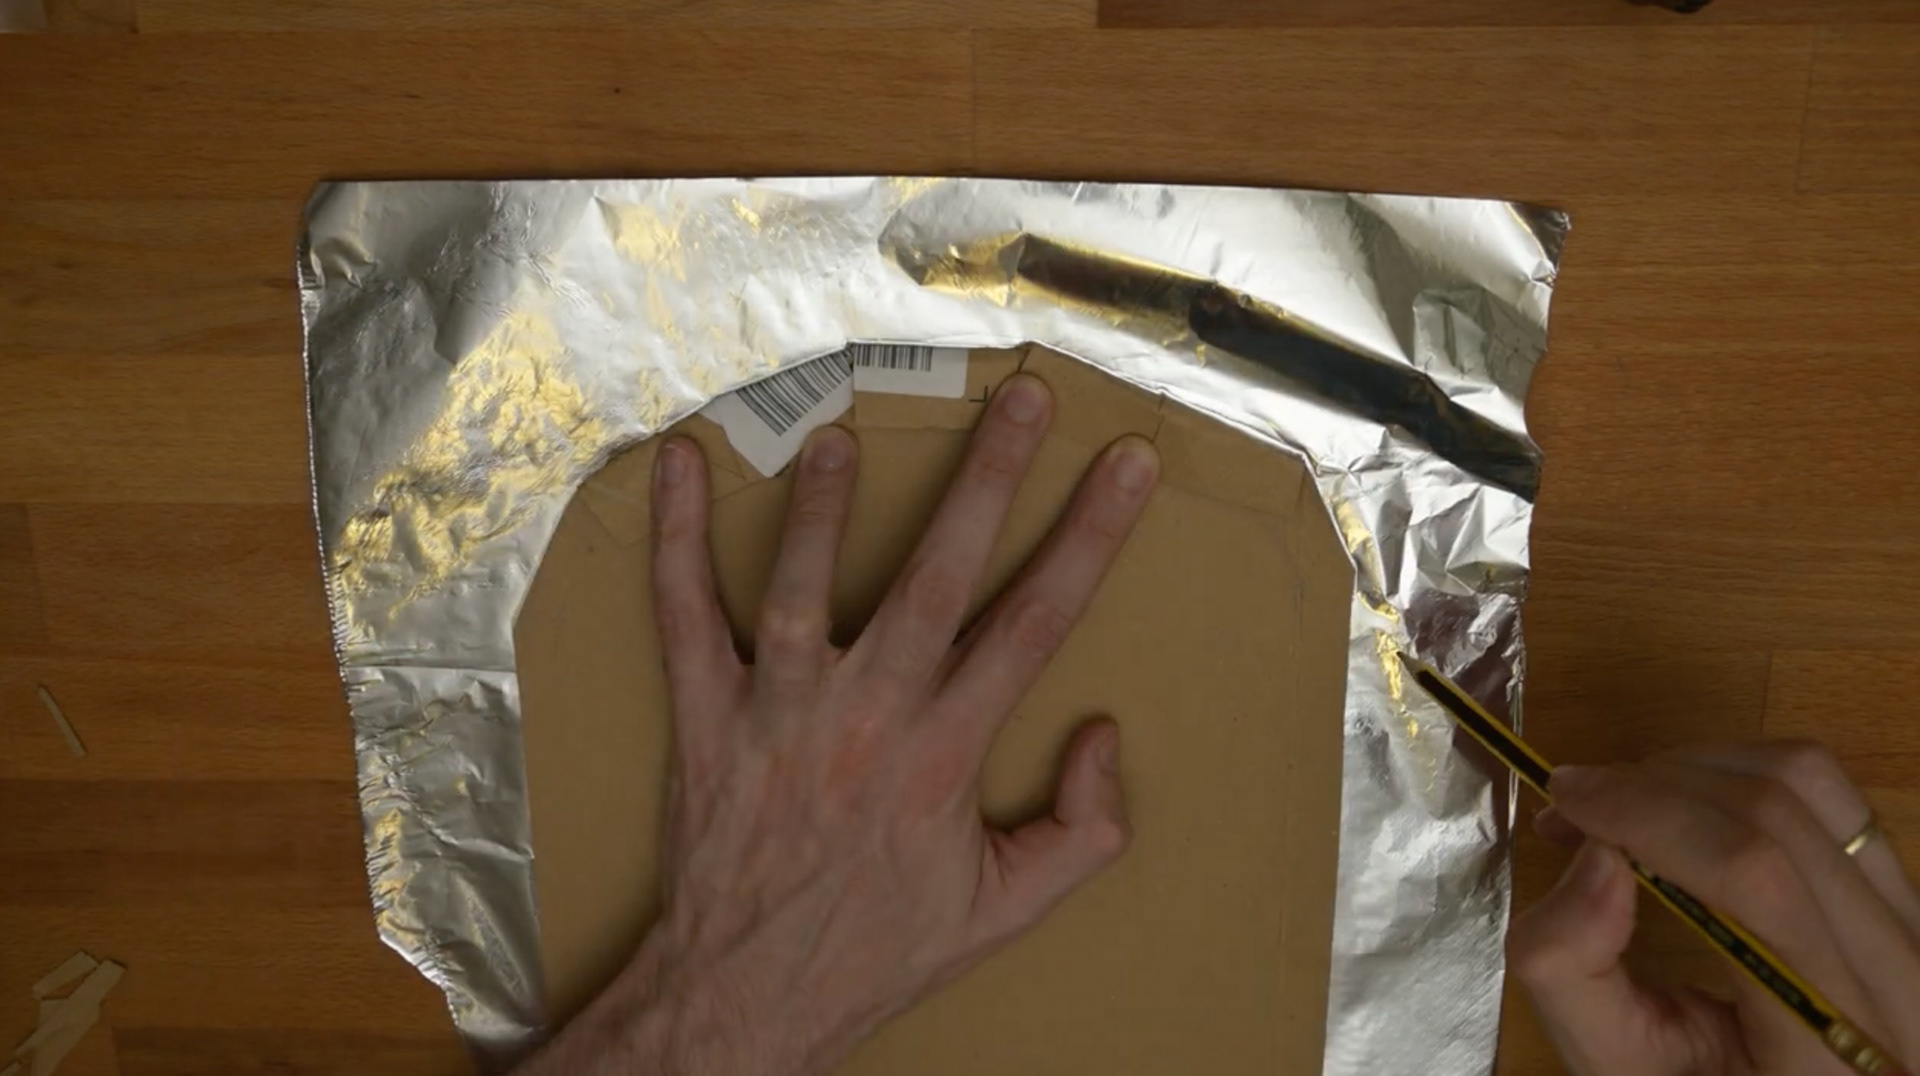
Cut a sheet of aluminium foil so it fits onto the cardboard you have prepared. Make sure to leave an overhang on each side. That will make sticking it to the cardboard easier. Now simply glue the aluminium foil on the cardboard.
Step 5:
Add velcro straps to the top, one on each individual flap and one on bottom end of the cardboard. Here i would recommend using the rough side.
Step 6:
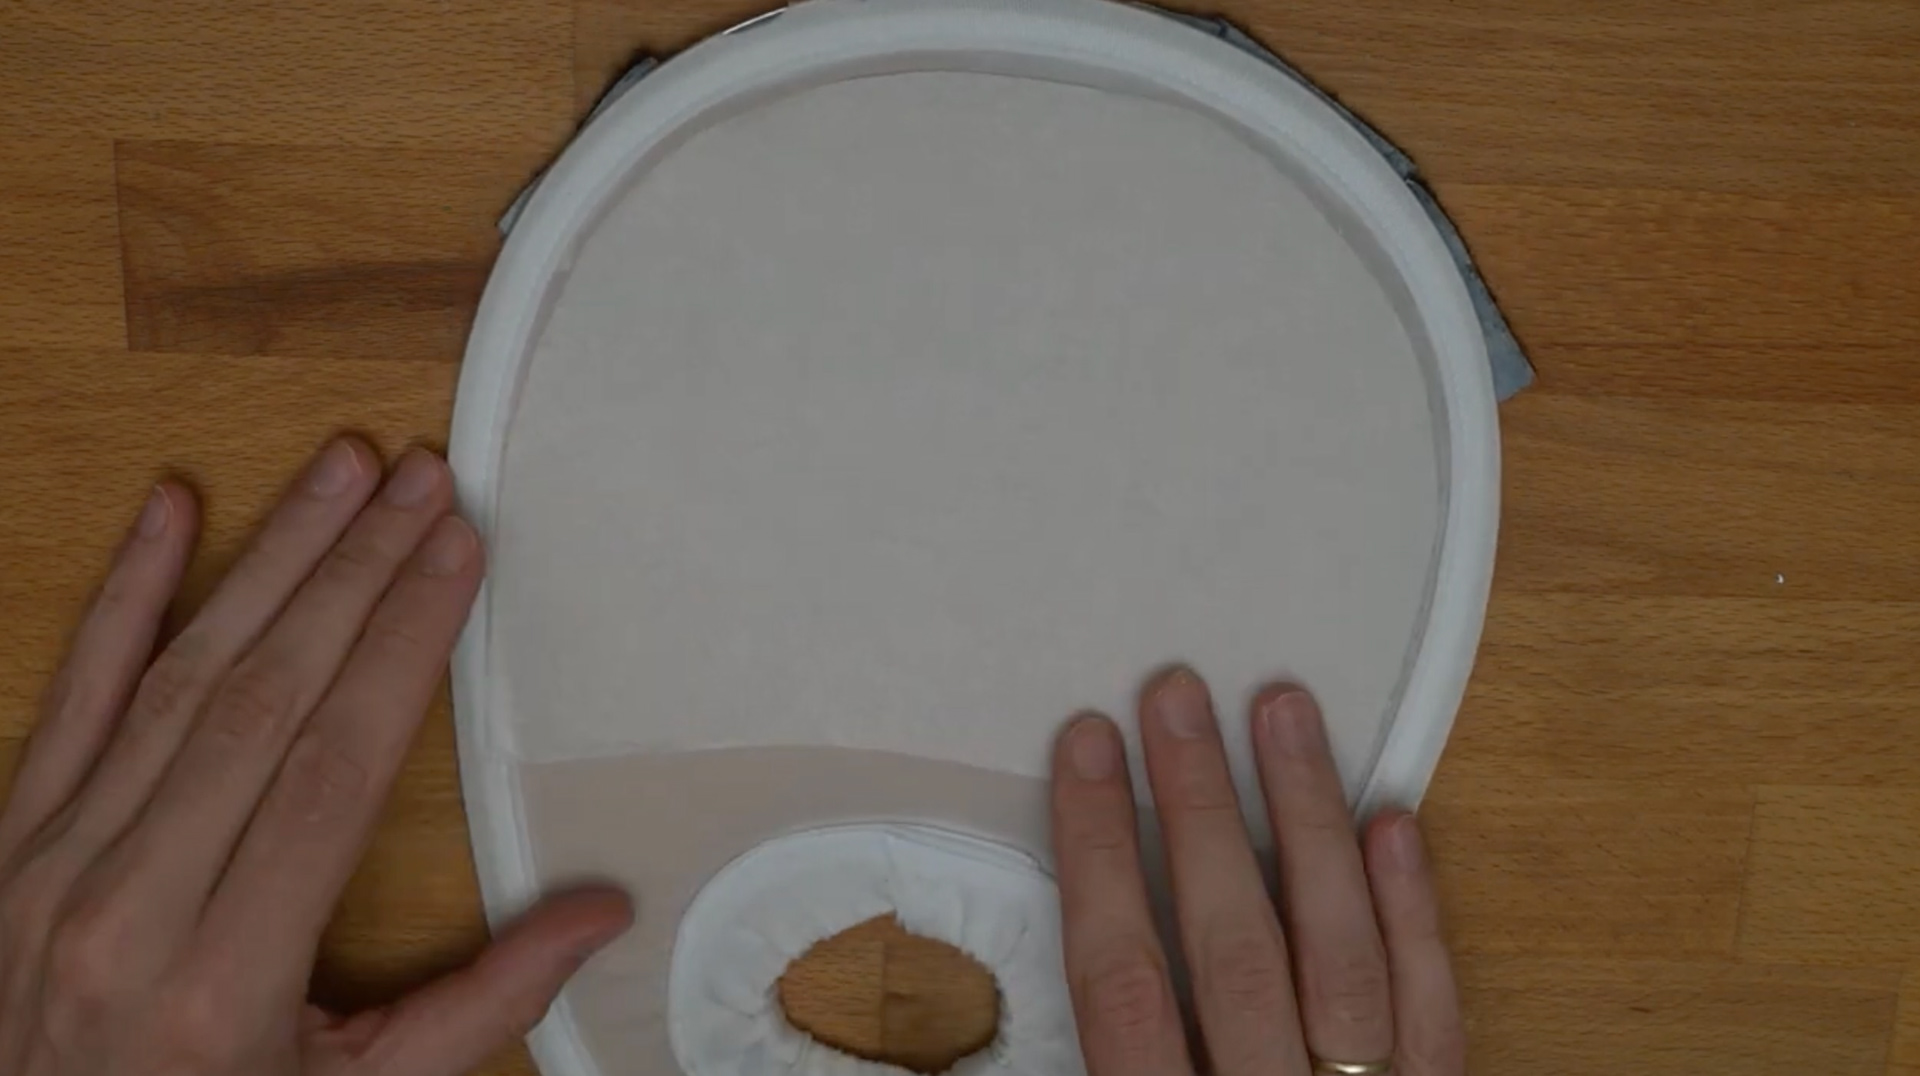
Cut a matching sheet of tracing paper and stick it to the inside of the foldable flash diffusor for an extra layer of diffusion. The inside is the side with velcro on the bottom.
Step 7:
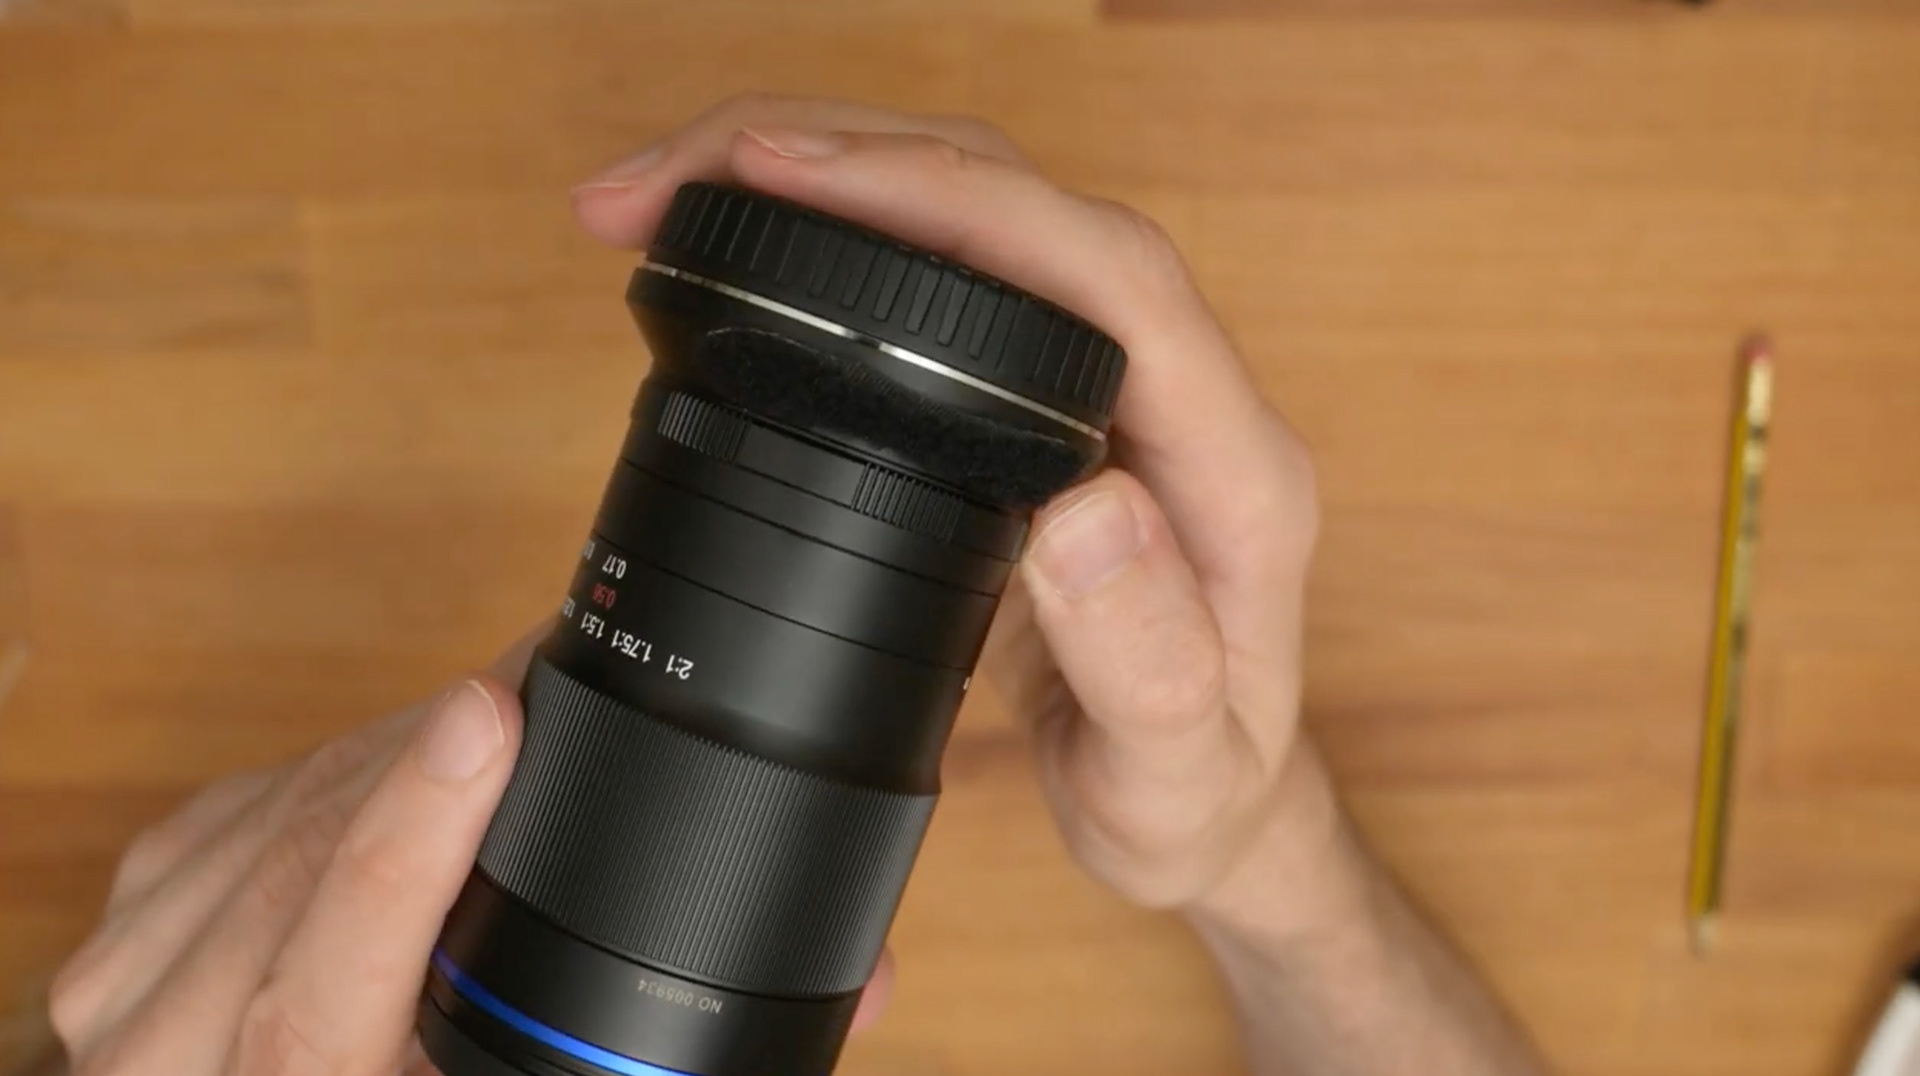
Add a thin strip of velcro to the bottom of the back end of your macro lens. I would recommend using the soft side of the velcro for this. This strip will secure the diffusor from the bottom.
Step 8:
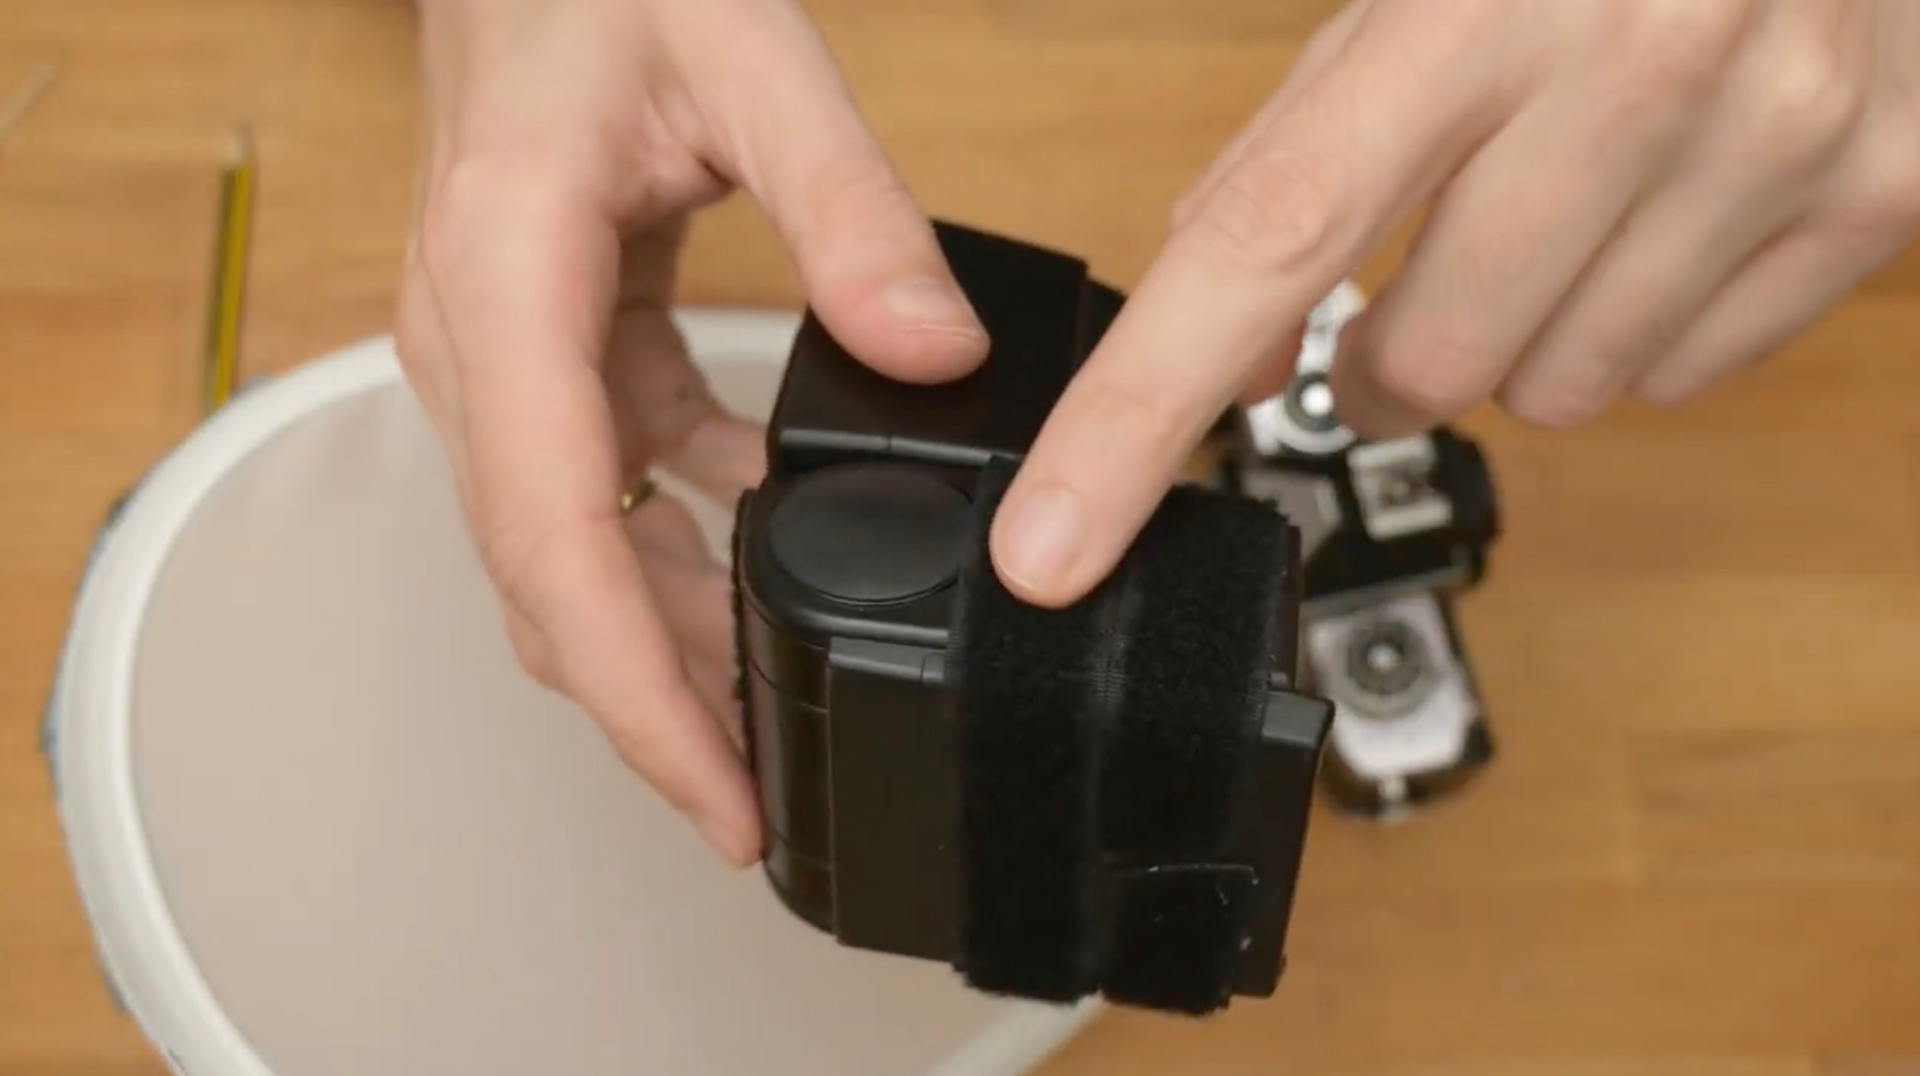
Add some velcro to the top of your flash. I just wrapped it all the way around the top. I would recommend using the soft side of the velcro for this.
Step 9:
Attach the cardboard roof to the foldable flash diffusor. Do this using the velcro strips you attached to the individual flaps and the top of the foldable diffusor. After this you can stick your camera lens through the foldable diffusors opening. Use the velcro strip on the bottom of your macro lens along with the velcro strips on your flash to secure your new macro flash diffusor to your camera.
There you go. You are now the proud owner of an affordable and portable macro flash diffusor. If you find the written instructions are hard to follow just check out the video below:
*The link is an Amazon affiliate link.